Re: Tips for objects that are difficult to scan
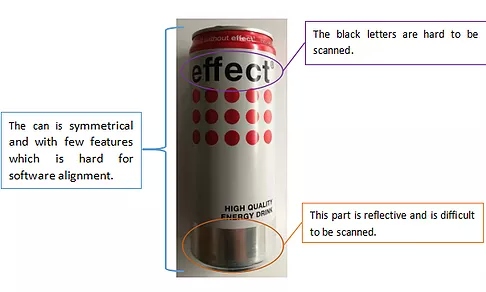
If you want to scan an object like a can; it may seems easy but hard to scan in practice.
There are different options to scan, here we would like to share some tips.
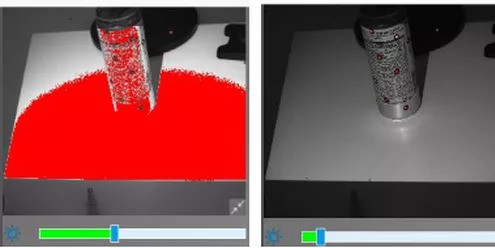
Before 3D scanning, you need to ensure to select the suitable level of brightness. If the level of brightness is too high, the screen will alert you in red, which means it is overexposed.
1. Scan with markers on the object
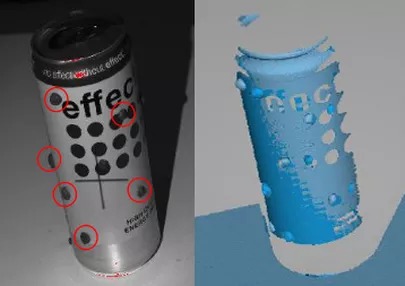
The first option is to scan with markers. Stick enough makers on the object and do not stick them symmetrically on the can, otherwise you may get the result below.
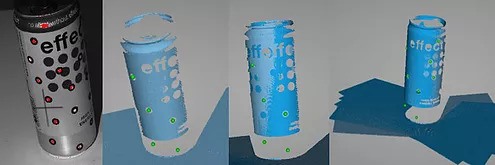
The first shoot seems good. But as mentioned before, the black letters and button are not able to be 3D scanned.
The second shot did not align with the first shoot. The letter ”e” is at a wrong position.
After several shots, the alignment cannot work probably.
How to solve such problems:
– Make sure you have enough markers on the object
– Stick the markers randomly on the object and do not stick them in lines or symmetrically.
– Don’t turn the object too much because the software needs some overlapped areas (at least 4 common points) to align the single shoots together.
2. Scan with makers around the object
In some cases, it is not allowed to stick markers on the object. You can put markers on a paper sheet or something else under the object.
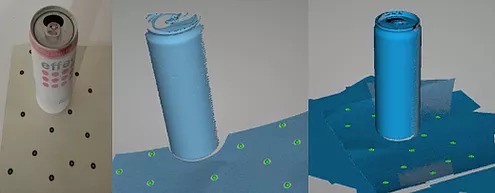
Make sure there are enough markers that saw by the 3D scanner in the first shoot.
Turn the paper with markers by hand and go on 3D scanning. Don’t move the object while rotating otherwise the alignment will go wrong.
3. Add features on the object
You can put tiny clay balls on the picture like the picture below. Make sure that you add enough tiny balls and put them randomly.
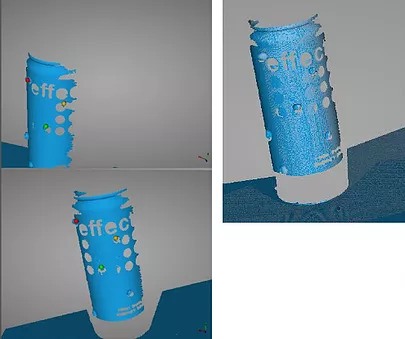
If the automatic alignment cannot work (picture on right), you can select manual alignment.
Click the button on the right window. A new window will pop up, where you see the two scan files. Choose three areas while holding the “shift” and click the left mouse button on the area. Ensure that the selected areas are overlapped parts for both scans. After setting up the third point, the window will be closed and the result will be shown.
Alignment process: Result after alignment:
EinScan
shining3d
einscan-s
einscan-pro
technical blog
3d scan
3d scanner
scanner
white light scanner


