Handheld 3D Scanning has enabled the flexible and mobile capturing of 3D data and is gaining popularity among businesses, professionals and hobbyists. The biggest challenge when getting started in Handheld 3D Scanning is practice. SHINING 3D equips you with user-friendly hard- and software. To smoothen your experience to the utmost, we are sharing with you today some useful hacks which will help you improve your scanning experience and your results.
1. The ideal scanning distance
The left column in the ExScan scanning software indicates the distance from the object by color. If the column displays red color the scanner is too close to the object, blue indicates too far away, green is the appropriate distance. According to the SHINING 3D Engineering Team´s experience, the scanning distance can be slightly further than the appropriate distance in the blue area.
2. Pay attention to the brightness
During the scanning process, differences in brightness will directly affect the amount of scanned data and the quality of the scan. Before scanning, press the “Start Scan Button” once to preview the process, you can adjust the brightness in the preview process. Double-click the “Start Scan Button” to open the brightness adjustment function.
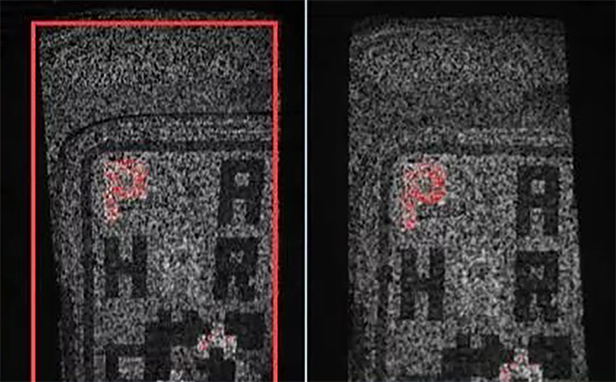
You can refer to the following two rules for ideal brightness adjustment:
(1) There should not be too much red area appearing in the preview window.
(2) In the preview mode, the software interface will display the preview of the acquired data. Adjust the brightness according to the degree of data integrity, try to choose the brightness at which the acquired data is most complete.
3. Move the scanner slowly and smoothly
In the process of scanning, the scanner needs to be swept over the scan object slowly and continuously. If it is the first time you use a handheld scanner, it is recommended to try to slow down the speed and gradually adapt to the rhythm of scanning.
4. Keep the scanner facing the scanning area
In many situations, the surfaces of the object being scanned are not facing the same direction. In the process of scanning, we have to change the direction of the scanner according to the direction of the normal surface to be scanned.
For example, when you scan the chin of the model in the following figure, you need to place the scanner as shown.

5. Focus correctly
Avoid only casting a small part of the light projected on the object, which might lead to insufficient scan data and alignment problems.
6. Adjust brightness settings accordingly
For example, the upper part of the object has a light color, while the lower part is darker; then we need to change the brightness during the scanning process depending on the color. If we start scanning from the top half with the light color, when the scanner moves to the darker part, it will cause less data acquisition in the dark areas, because the brightness present was set based on the light color. Therefore, at this time it is recommended to double click the “Start Scan button” on the scanner, turn on the brightness setting function and adjust the brightness to the appropriate value by “+” and “-” bottoms.
7. How to easily scan the human body
When scanning the human body, you can use the up-down scan order, starting from the face, imagining that there is an axis on the human body, turning a circle clockwise according to this axis before moving down. Then do another circle of the scan, this time in a counterclockwise direction. You can scan the model in separate parts and later on align them together.


