In a recent webinar, SHINING 3D ambassador Matt Perez demonstrated how he scanned parts of a car to create a wide body design. He used an EinScan Pro HD 3D scanner combined with EXScan Pro scanning software and Fusion 360.
Matt walks us through the steps of 3D scanning and designing, providing an in-depth overview of EXScan Pro. This article covers some of the key highlights from Matt’s insightful webinar. Read on to see how you can easily optimize your 3D scanning results!
Table of Contents
How to use EinScan Pro HD & EXScan Pro to capture and process data
3D scanning and designing generally involves four steps:
– Scanning the part
– Processing the mesh
– Aligning to the coordinate system
– Designing the 3D model
Matt used the rapid scan and hybrid align modes for large objects like cars. Matt provides a tip about markers, which guarantees that at least four markers are always in the light pattern.
After processing the data and aligning the mesh to the coordinate system in EXScan Pro, you can import the data to Fusion 360 and start designing. You may learn more details about each design step from the webinar reply video.
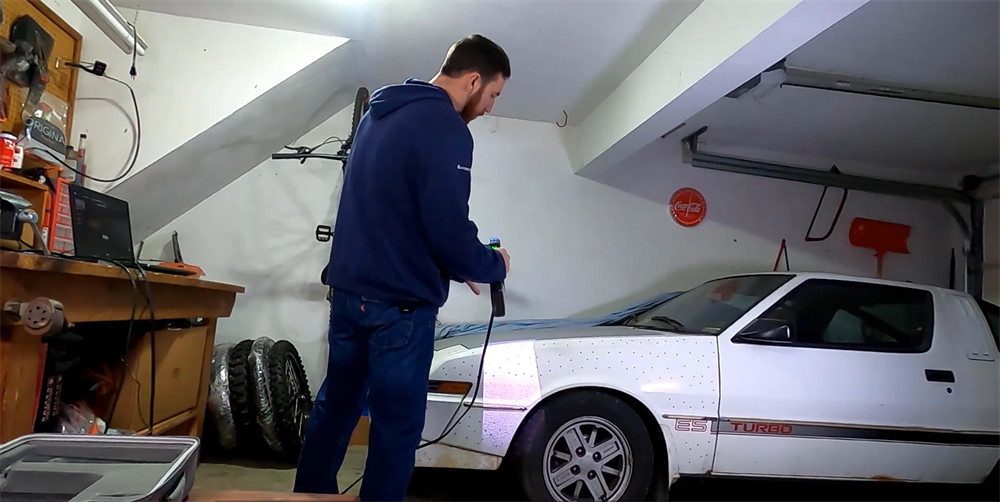
Step 1: Scanning the car part with EinScan Pro HD multifunctional 3D scanner
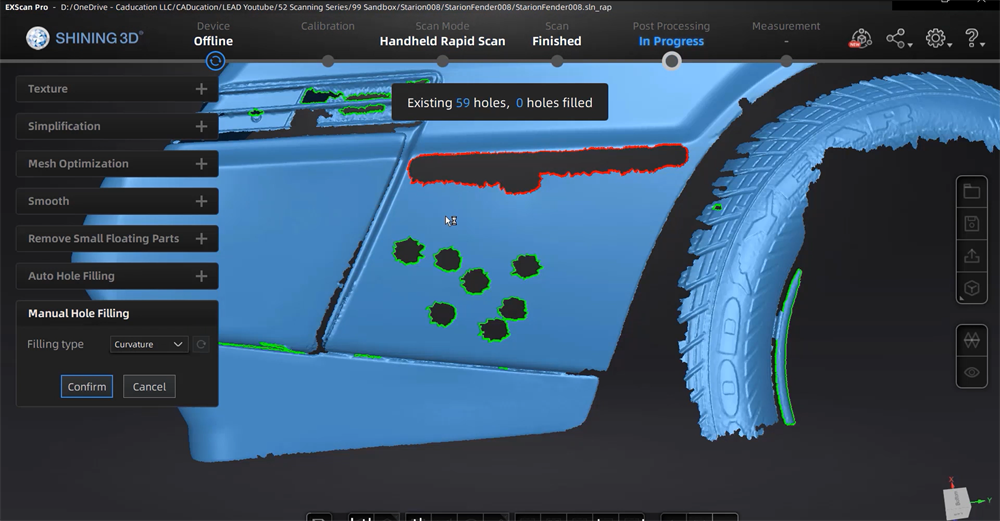
Step 2: Processing the mesh in EXScan Pro software-filling holes
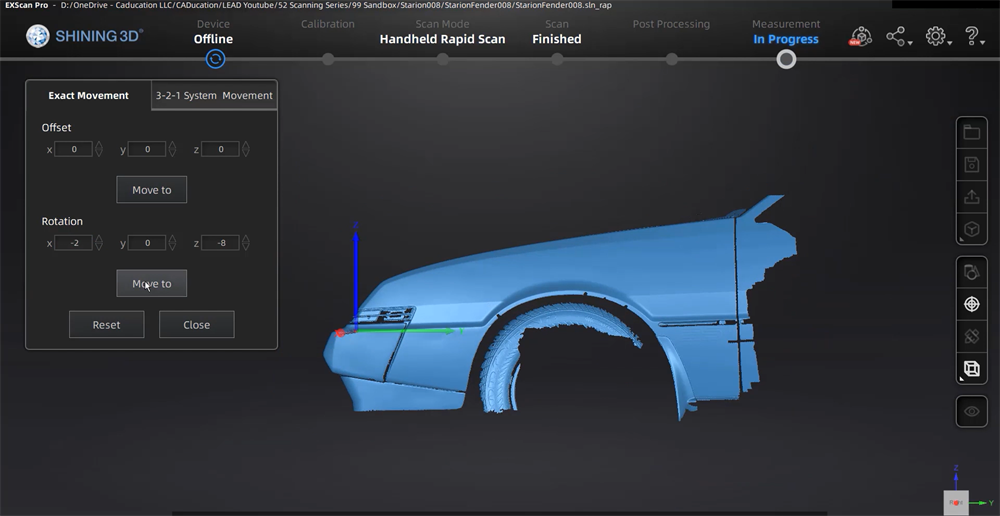
Step 3: Aligning to the coordinate system
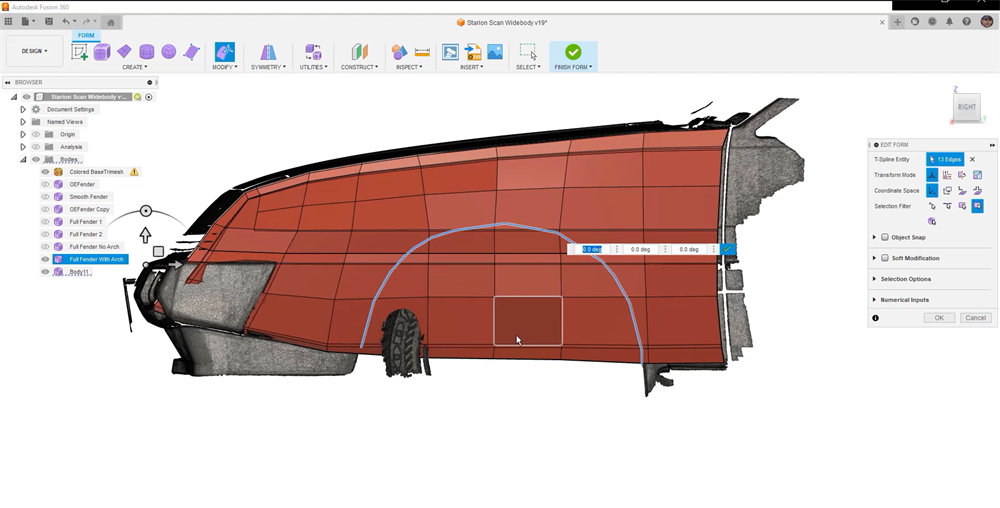
Step 4: Designing the wide body part in Fusion 360
How to choose a suitable scan mode
Different object types and sizes require different 3D scanning modes. The EinScan Pro HD multifunctional 3D scanner provides 3 scan modes:
– Fixed scan: In this mode, the 3D scanner sits on a tripod and can be paired with an automatic turntable. The fixed scan mode is usually used to scan small and stable objects.
– Handheld rapid scan: In handheld rapid scan mode, you hold the 3D scanner and move around the object as if you were filming it. This mode is best for scanning large objects or objects that cannot be easily moved.
– Handheld HD scan: The HD scan mode is, like the rapid scan mode, a handheld one. However, it captures more details than the rapid mode and is best for high-resolution scans of small or intricate objects.
How to adjust 3D scan settings
Each scan mode offers its own set of more advanced settings.
Fixed scan mode
HDR settings, for example, are only available in the fixed scan mode. These settings allow us to view each scan’s brightness.
The turntable option is another setting that is exclusive to the fixed mode. This allows for semi-automatic 3D scanning. You place the object at the center of the table and tell the software to turn it 360°. The scanner captures the object every 30°, for example, until it completes its full rotation. Then, you can flip the object over to capture its top and bottom sides. And by using coded markers on the object and/or table, the software can automatically align each scan.
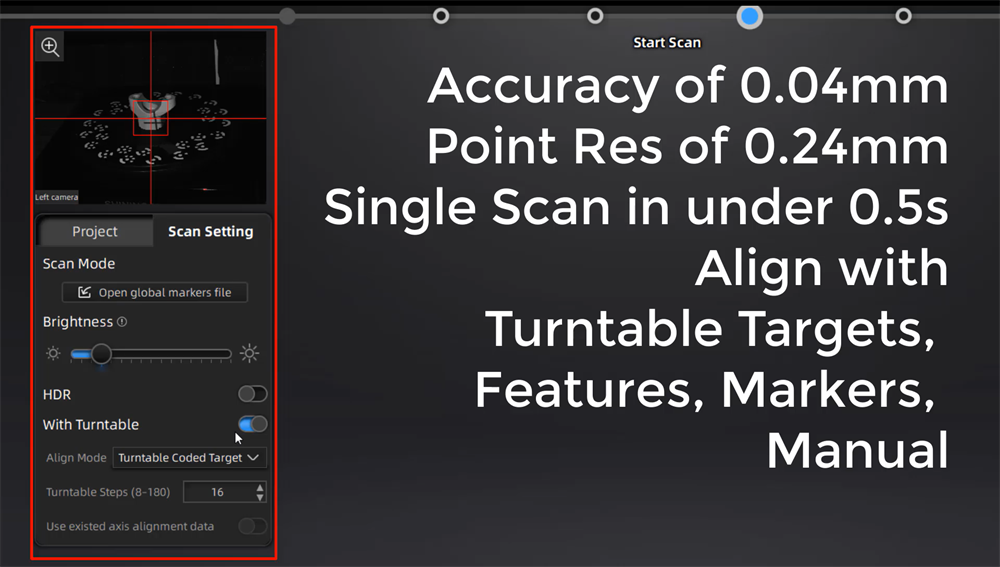
Scan settings of the fixed scan mode
Handheld HD scan mode
The handheld HD scan mode offers two operation mode settings: Classic and High-detail. Both of these modes offer a standard speed of 10 FPS (frames per second). However, in high-detail mode, we need to shorten the working distance.
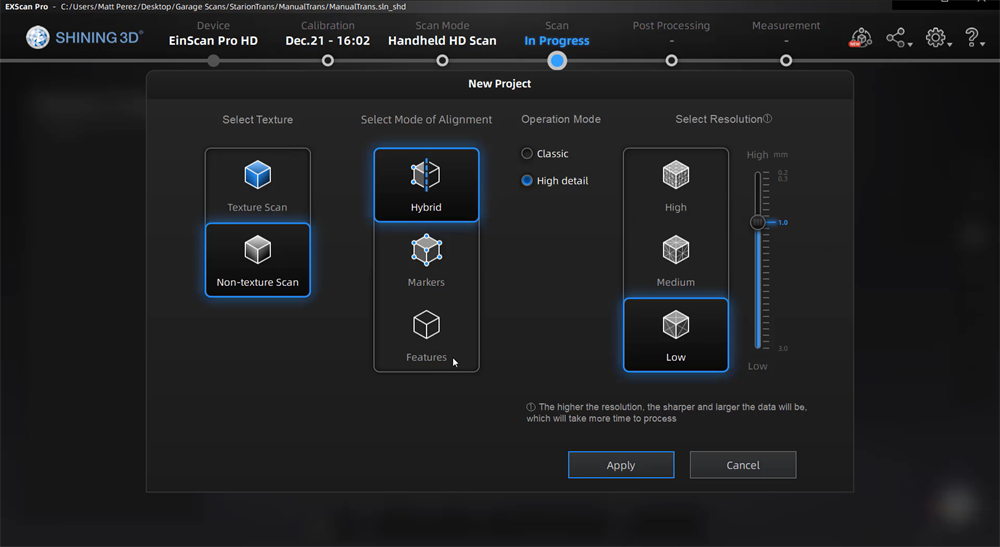
Scan settings of the handheld HD scan mode
Handheld rapid scan mode
The alignment of the rapid scan mode is very similar to that of the HD mode, but the operation mode is different. We still have a classic option, but now it’s capturing more frames per second than handheld HD mode. Classic is at 15 frames/s at the selected resolution. We also have a lightning option and a lightning + refine. These have some unique differences between our handheld HD. The lightning captures at 30 frames/s at 1mm resolution with interpolation, and lightning+refine happens at the same 30 frames/s. It is important to note that you may lose some details in fast scan mode.
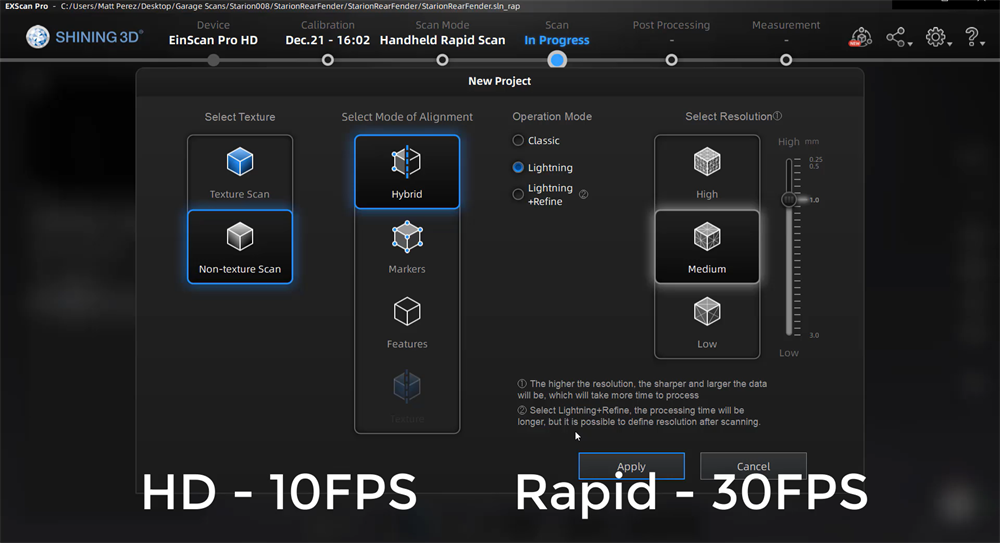
Scan settings of the handheld rapid mode
How to adjust mesh settings
The two important options we need to consider in the mesh settings are filter and smooth. The filter looks at the current mesh we have created and the high and low areas. A low filter will be less destructive, leaving more of the original mesh in place. And the smooth looks at increasing the mesh density to smooth it out. Matt applied different mesh settings to the same scan data in the webinar to show the difference. Matt suggests setting the filter to low, medium and high and doing a high smooth to get an idea of what it’s doing or changing your design as you go through various scans.

Comparison under different mesh settings
Conclusion
These are just the highlights of the webinar. Still, if you’re eager to delve deeper into 3D scanning and designing, Matt has created a comprehensive instructional series on YouTube. In this series, he provides a step-by-step tutorial on scanning to designing a car wide body using the EinScan Pro HD 3D scanner, EXScan scanning software, and Fusion 360. If you’re interested in learning more, check out the series here.


